


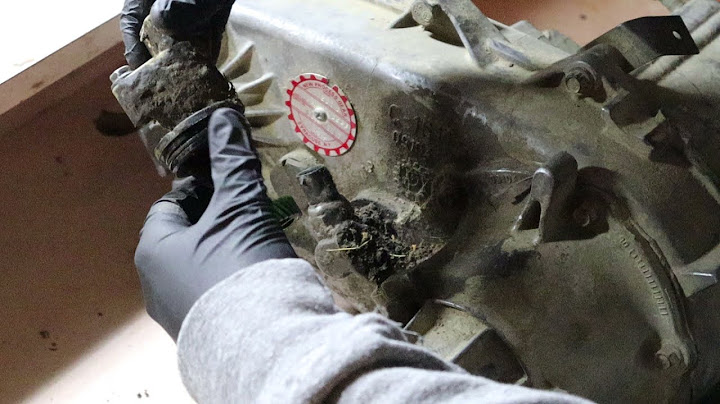
The anti-lock brake system of a vehicle uses a wheel speed sensor to determine the speed of the moving wheel in order to control the anti-lock brake or traction control functions. While some model of vehicles uses a single sensor on one wheel for speed signals, other vehicles use more than one. Show However, some vehicles with anti-lock brakes use speed wheel and transmission output to spot any faults whereas those that have no anti-lock brakes use the transmission output alone. When the wheel speed sensor breaks, the dashboard light for ABS or traction control system turns on. Similarly, after scanning the ABS computer, if you receive a trouble code, it is most likely that the sensor is unplugged or needs replacement. Fortunately, it is easy to replace a wheel speed sensor and takes you about an hour at maximum. You can also remove the ABS wheel speed sensors separately keeping other parts integrated into the wheel bearing hub assembly. PREPARING TO REMOVE A WHEEL SPEED SENSOR To begin with, you have to be determined that you are going to fix the problem yourself. Once you are confident enough, park your car on level ground with the transmission in the park. Set off the emergency brake and turn the engine off. But before that make sure you buy auto parts and accessories as well as tools to get the job done. Besides, check and ensure that you have got the right type of wheel speed sensor, compatible with your vehicle’s make and model. Use a jack to lift the car up. You need to remove a tyre or replace a control module. You will also need to remove the brake calliper and brake pads when you replace a wheel speed sensor. Read on for a step by step guide to replacing a wheel speed sensor. Here is a step-by-step guide on how to replace an ABS wheel speed sensor yourself: STEP 1Before you jack the vehicle up, use a ½ inch drive breaker bar along with a lug nut socket set to pull the lug nuts loose. STEP 2Now use the jack to lift your vehicle up in the air and place stands to keep it in position. Make sure you have jacked the vehicle up in the correct location. Ensure the stands are in place on the frame before you lower the vehicle onto them. STEP 3The next step is to remove the old speed sensor. You might have to remove the brake pads and rotors to get a clearer view of the bolts that hold the sensors onto the hub. Once done, remove any clips that are securing the sensor wiring to the vehicle’s body. Unplug the wires so that they can be completely removed. Use a sandpaper or emery cloth to clean rust in areas where the new sensor will replace. STEP 4Get a new wheel speed sensor and brake parts. Repeat step 3 in reverse order. Plug in the new connector and route the harness back so it is secured to the vehicle body. Insert it into the hub or the knuckle. In case you needed to remove the brakes as well, simply reinstall the rotor and brake calliper bracket alongside the brake pads. Make sure you rotate everything according to the factory specifications. STEP 5Now that you have replaced the speed sensor, it’s time to reinstall the wheels. Using the lug nuts, simply place the wheels back onto the hubs and snug them down with a ratchet and socket. STEP 6Place the jack in the correct spot under the vehicle, lift the car up, and remove the jack stands. Now you can lower the vehicle back to the ground. STEP 7You have to rotate the wheels back. Most car models use a torque from 36 kgs to 45 kgs whereas SUVs and trucks use anywhere from 41 kgs to 54 kgs. As done earlier, use a ½ inch torque wrench to twist the lug nuts to their proper specification. STEP 8Take your vehicle out on a test drive. You will have to remember that after you replace a wheel speed sensor, the dashboard lights should turn off. In case they don’t, make it a point to take your vehicle to a certified mechanic and have them reset the internal computer. For a test drive, go down a safe road, speed up, and hit the brakes hard to ensure the ABS is working properly. As you can see, replacing a wheel speed sensor is a one-way, straight job given that you have the right tools and knowledge. Whether you own a used car in the UAE or a new one, if you think you can’t or don’t want to replace the part yourself, then head to a service centre for professional assistance. We hope you have learned ABS wheel speed sensor replacement by the abovementioned steps. Once you have done the replacement, you will have to be observant of abnormal noises or performance issues in your test drive that could possibly indicate a problem requiring further inspection. Stay tuned to UAE’s top auto blog for more how-to guides on replacing and fixing different vehicle parts. Why is my ABS light on after replacing ABS sensor?The four common reasons that typically cause this light to turn on include a malfunctioning ABS module, low levels in the fluid reservoir, broken wheel speed sensors, or the system is turned off. Your ABS actually shares some important components with another system in your vehicle: your traction control system.
How do you reset ABS light after changing speed sensor?Step One: Disconnect the positive cable from your car battery. Then, hold down the brake pedal to drain the vehicle's electrical system. This will result in a reset of the car's central computer. Plug the cable back in to restore power.
What happens if one ABS sensor is not working?Pulsating Brake Pedal while braking
The ABS sensors measure the speeds of each wheel, and if one of the ABS sensors has gone bad, it will read the wrong speed on one or more wheels. This will cause the ABS control module to get tricked and thinking the car is sliding on a slippery surface.
|

Replaced wheel speed sensor still not working


Copyright © 2024 mempelajari Inc.